- How to Create a Zapier Integration to Trigger a Third Party Action with a Webhook
- Available Webhook Triggers
- Creating a Webhook Trigger
- Step 1: Login to Zapier
- Step 2: Setup the Event Trigger in Zapier
- Step 3: Setup the Action Event in Zapier
- Step 4: Add your Data Fields in Zapier
- Step 5: Login to your Skycore account
- Step 5: Create your Trigger
- Step 7: Choose your Messaging Trigger & Campaign
- Step 8: Enter the Webhook URL from Zapier
- Step 9: Review Integration Data Fields in Skycore
- Step 10: Activate your Integration
- Step 10: Test & Run Your Integration
How to Create a Zapier Integration to Trigger a Third Party Action with a Webhook
This guide will walk you through the process of setting up a Messaging trigger in Skycore that can activate an action in another app through Zapier. By integrating Zapier’s webhooks with Skycore’s webhook system, the Messaging trigger will automatically execute the desired action. Zapier offers ready-to-use webhooks that eliminate the need for coding. To establish the connection between the two systems, select Zapier’s webhooks as the trigger, provide the necessary details, copy the URL provided by Zapier, and paste it into Skycore. If you need more detailed information about Zapier webhooks, please visit this article: Webhooks Guide.
Available Webhook Triggers
The following list shows all available messaging webhook triggers. You can read more about each trigger in the sections below.
- User subscribes to a campaign
- User unsubscribes from a campaign
Creating a Webhook Trigger
A webhook “Trigger” can initiate an action in another app to take place. The Webhook triggers currently supported are when a user subscribes or unsubscribes to a campaign or opt-in list. The following steps will show you an example of a contact being created in Hubspot when a user subscribes to a messaging campaign.
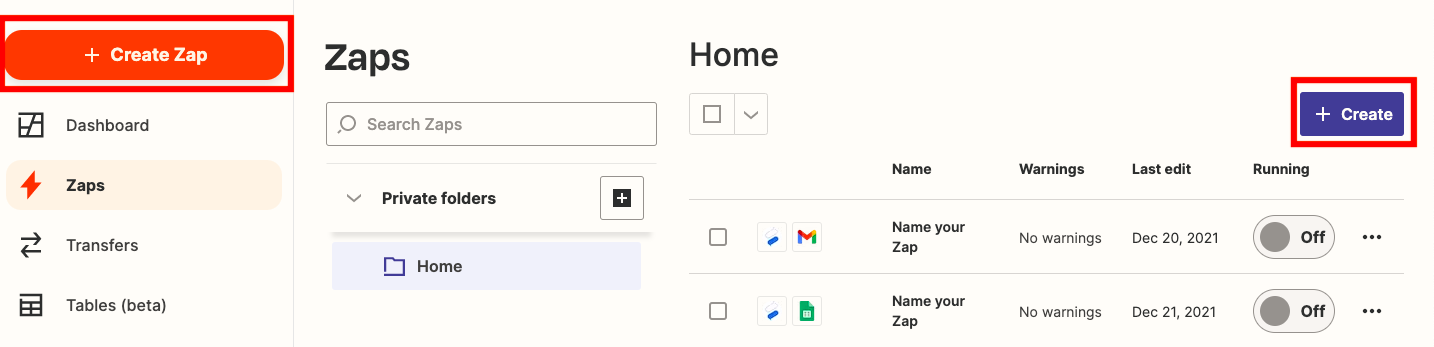
Step 1: Login to Zapier
Login to your Zapier account and create a Zap.
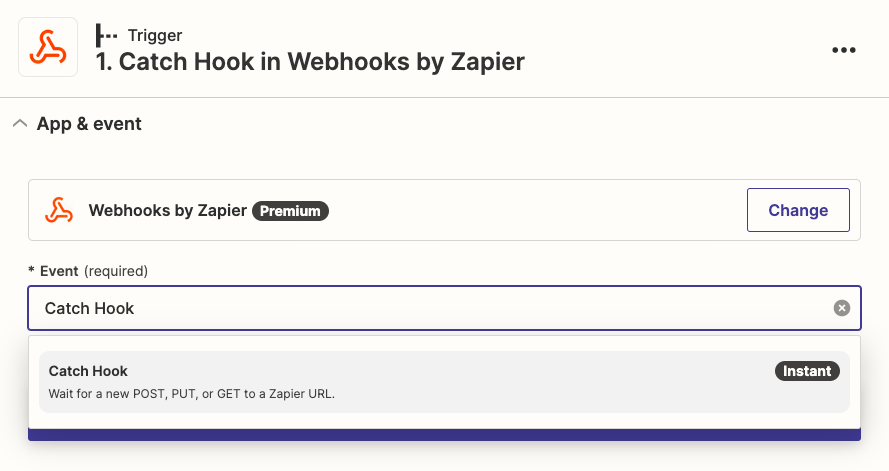
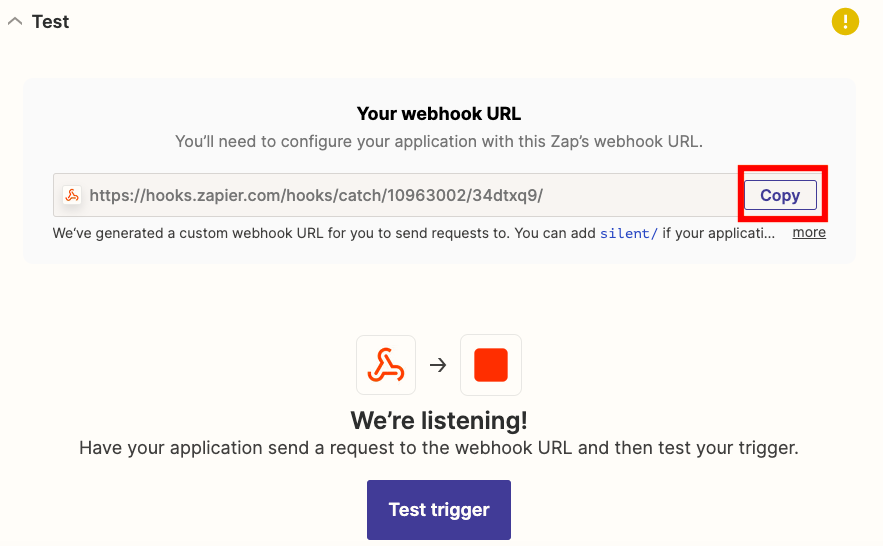
Step 2: Setup the Event Trigger in Zapier
Choose Webhooks by Zapier for the app event “Trigger” and select Catch Hook from the drop-down menu for the “Trigger” Event. Copy the Custom Webhook URL provided by Zapier.
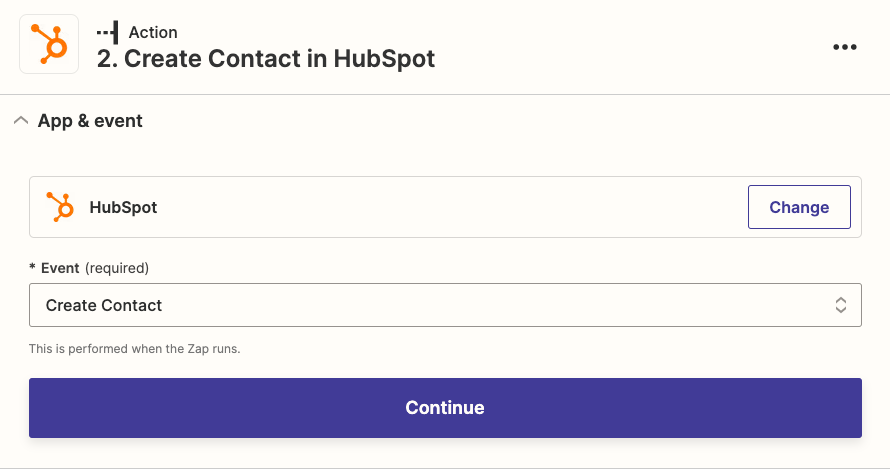
Step 3: Setup the Action Event in Zapier
Choose the app where the “Action” will take place once a Zap is received. Choose the “Action” event from a different app.
Step 4: Add your Data Fields in Zapier
Add the data fields that you need to pass through the URL to your Zap in Zapier. Each Action you choose may allow for more or less fields to add, depending on the Action app. Map your fields by choosing from the drop-down menu provided in Zapier. These data fields will later be added in Skycore so be sure to copy or write down the data fields you will be using in the integration.
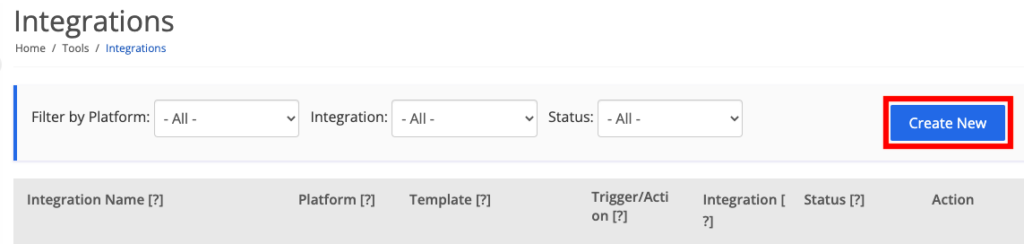
Step 5: Login to your Skycore account
Go to the Integrations page in the Tools tab of your Skycore account. Click ‘Create New’.
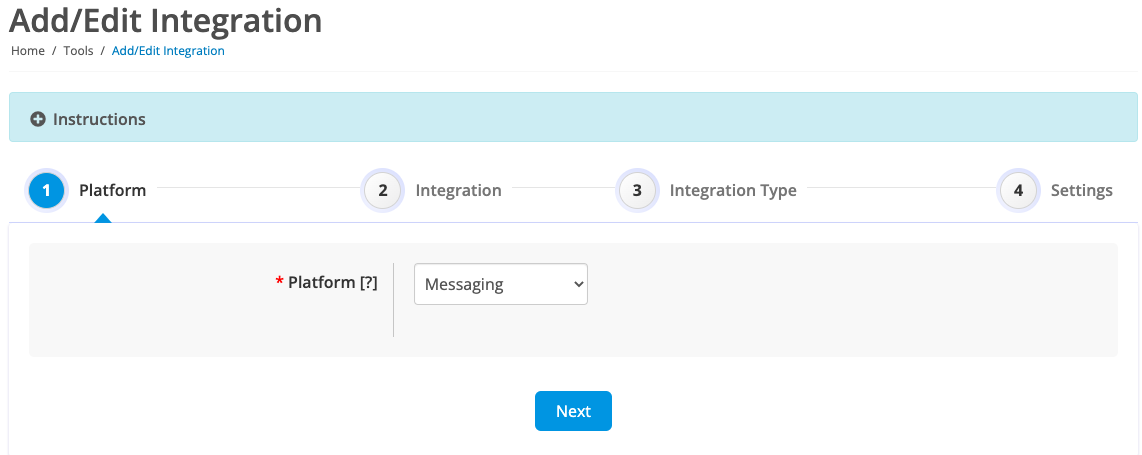
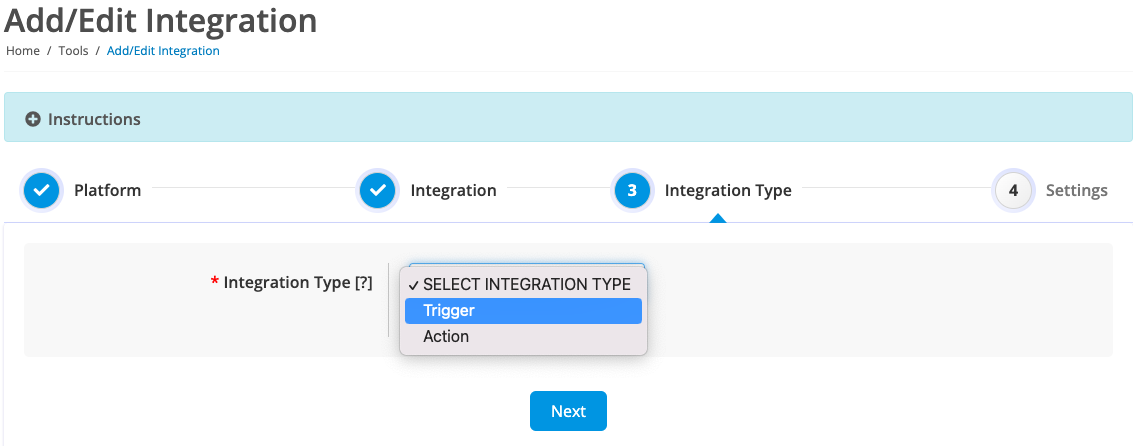
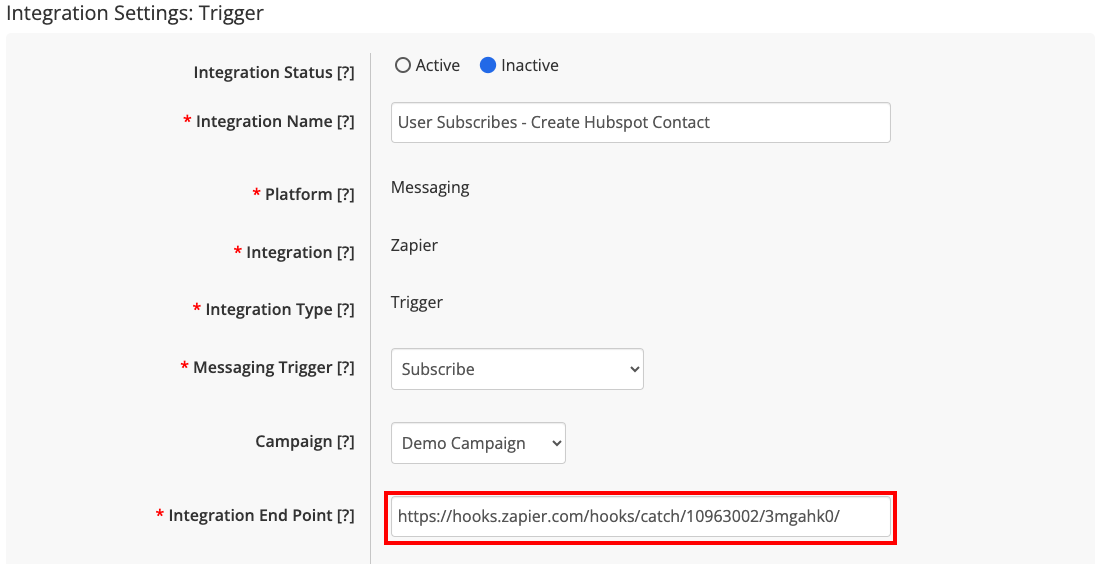
Step 5: Create your Trigger
Create your “Trigger” on the Skycore platform on the integrations page. Choose Messaging as the Platform, Zapier as the Integration, and Trigger as the Integration Type.

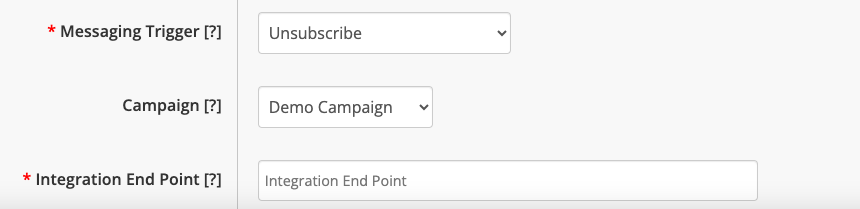
Step 7: Choose your Messaging Trigger & Campaign
Fill out the integration details and select the type of Messaging trigger you want to use. Skycore has two different Messaging triggers that can cause an action to take place from another app by creating a “Zap.” Each trigger is listed below along with an example of how each might be used. Each trigger also requires you to choose a campaign from the drop-down menu to subscribe or unsubscribe a user to/from a specified campaign.
Option 1: Subscribe
When a user subscribes to a messaging campaign, the “Subscribe” trigger is used to initiate an action. One example of this trigger is to automatically create a new contact in your CRM when a user texts a keyword to a code to opt-in or “subscribe” to a campaign.
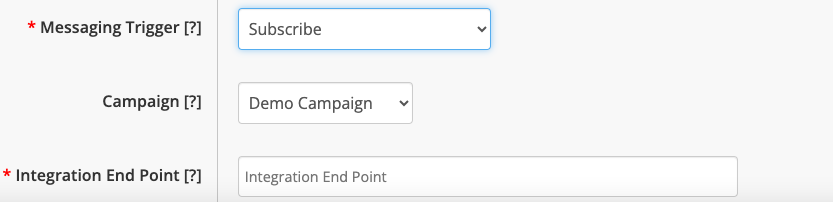
Option 2: Unsubscribe
When a user unsubscribes to a messaging campaign, the “Unsubscribe” trigger is used to initiate an action. One example of this trigger is to update the CRM system and remove a user when they unsubscribe from a messaging campaign.
Step 8: Enter the Webhook URL from Zapier
Enter the Custom Webhook URL from Step 2 above into the Integration End Point field. Save your integration once all of the necessary fields are filled out.
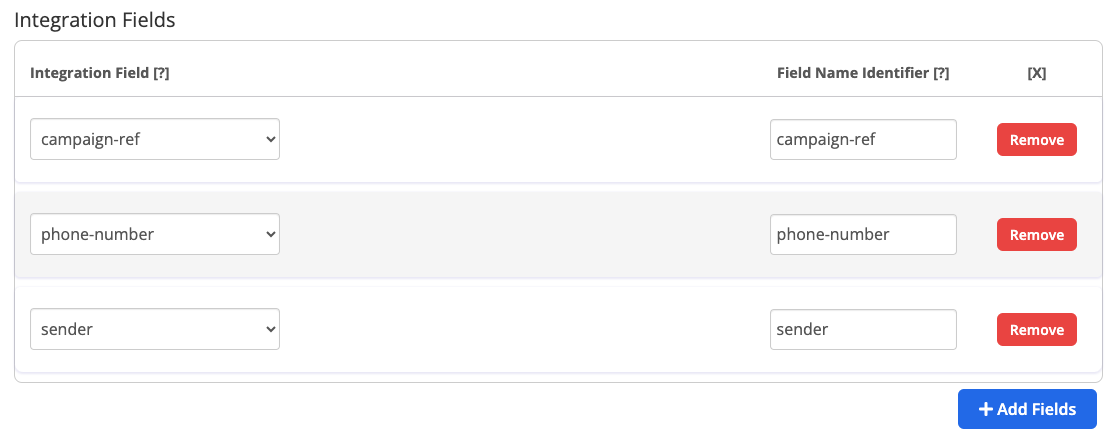
Step 9: Review Integration Data Fields in Skycore
Each trigger option has a set of data fields or “integration fields” that enable you to send data to the integration endpoint URL provided by Zapier. Review the list of “integration fields” that are available for each trigger and remove any that were not added previously in Zapier from step 4 above. You can also rename the field by editing the “Field Name Identifier” column to match the exact names in Zapier.
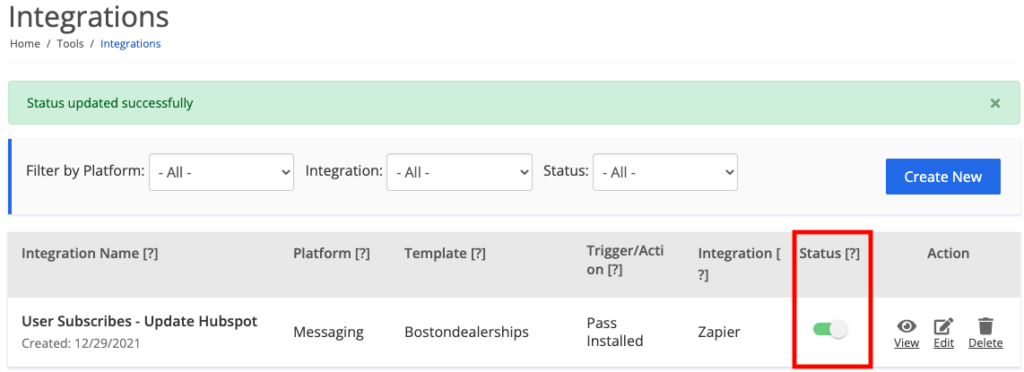
Step 10: Activate your Integration
Set the Integration Status to “Active” when you are ready to use your integration.
Step 10: Test & Run Your Integration
Once you’ve created your Zap for a Messaging Trigger in Zapier, you can test the integration to make sure it is working properly. After testing, click “Publish” in the top right corner of the Zap creator and toggle your Zap to “Running” status when you are ready to use it. For additional help creating and managing Zaps, read more here: Creating Zaps