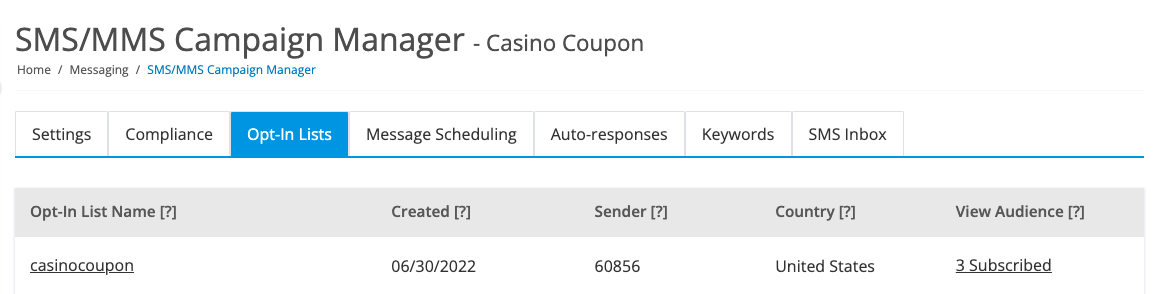
How Do I Manage My Opt-In Lists?
You can manage your Opt-In Lists in the Opt-In Lists tab in the campaign. In the Opt-In Lists, you can search for a specific audience member by phone number, time zone, or carrier, and import your Opt-In List into the campaign. Also, you can generate reports by exporting the list into a CSV file.
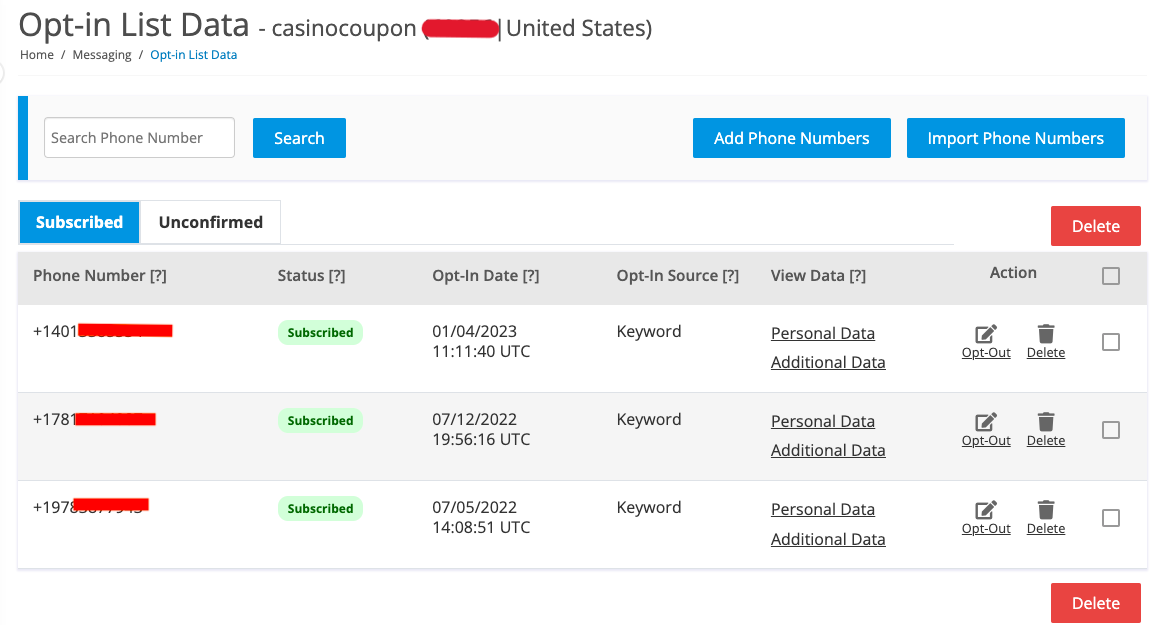
Your Opt-In List members are divided into two lists: Subscribed and Unconfirmed. Members that have opted into the campaign will appear in the subscribed list as below:
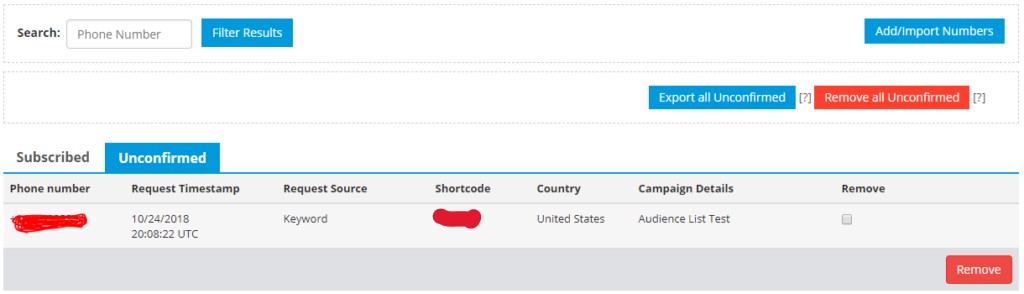
Likewise, members that have not yet replied ‘yes’ to confirm the opt-in will appear in the Unconfirmed list as below:
Building Your Opt-In List
In order to build your Opt-In List, the person must have agreed in writing to receive messages from you (i.e. opt-in). The opt-in is typically done by text messaging YES when asked to confirm an Opt-in. The list can be populated in several ways:
| Method | Description |
|---|---|
| Add Number | Add a single phone number with the “Add Number” button. |
| Bulk CSV Import | Select the “Import Numbers” button to import a CSV list of contacts into a campaign. Make sure all phone numbers include a country code. You can also add subscriber data by adding rows and setting the custom options during the column mapping process. |
| Mobile Keyword Opt-In | Assign a keyword to the campaign’s shortcode. Whenever users text the keyword to the campaign’s short code, they will be opting into the campaign. Alternatively, an MMS Inbox keyword can also be used to trigger the opt-in flow. If a double opt-in is required, they will need to reply YES before being subscribed. |
| API | Use the API to subscribe to list members (contacts). |
How do I set up my CSV file to import subscriber data?
Create and upload a CSV file with a row for each subscriber. The columns of the CSV file should correspond to the data you would like to have imported into the system. The standard columns provided by default are phone number, subscriber reference, custom, and none of the above. The only required column is the phone number. Make sure the phone numbers include a country code.
How do I column map my CSV imported data?
Match the detected columns of the CSV file to the standard columns of the campaign. Each detected column must be assigned to a standard column. The custom option allows you to add your personal tags or create a new subscriber tag. Click the “Personal Data” link if you used your personal tags, otherwise click the “Additional Data” link.
Managing Your Opt-In List
Opt-In List members are split into two lists: the subscribed members and the unconfirmed members.
| Member Type | Description |
|---|---|
| Subscribed | The subscribed list displays all numbers currently subscribed to the campaign. By filtering results, you can perform a mass export, opt-out, or removal of numbers from the list. You can also individually view/edit subscriber data, opt-out, or remove a single number. |
| Unconfirmed | The unconfirmed list displays all numbers that received a double opt-in message but never replied yes. You can export unconfirmed numbers from the unconfirmed list. You can also individually view/edit subscriber data. |
Each phone number listed displays data about the Opt-In List member, such as the shortcode/country, carrier, timezone, and when the Opt-In List member opted-in or out of the campaign. If the number is imported with data, then it can be found in the ‘View Data’ column.