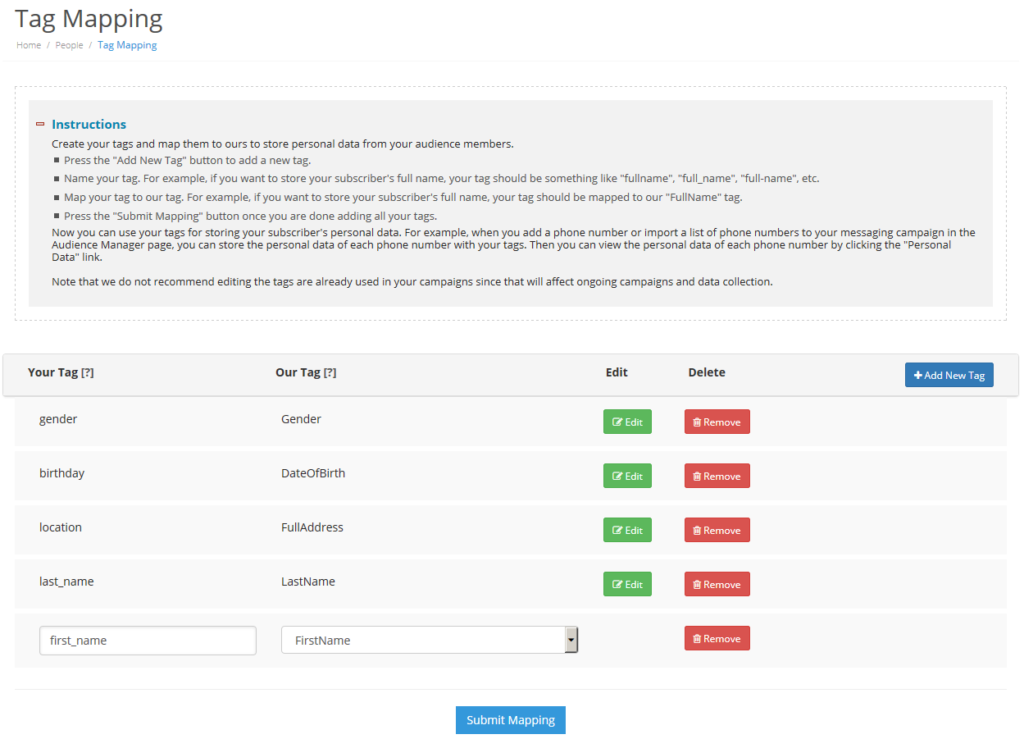
The Tag Mapping page is a page where you can create your tags and use them to collect and store your audience members’ personal data.

How do I add a tag?
- Press the “Add New Tag” button.
- Name your tag. For example, if you want to store your subscriber’s full name, you may want to name your tag “fullname”, “full_name”, “full-name”, etc.
- Map your tag to our tag. Using the same example as above, you would select “FullName” for our tag.
- Once you are finished adding your tags, press the “Submit Mapping” button.
Once you have submitted the mapping, you are ready to use your tags to collect and store your audience members’ personal data!
For example, when you import your list of subscribers and their personal data into your messaging campaign in the Opt-In Manager page, you can map your personal data columns to your tags. Once the import process is completed, you can view the personal data of each phone number by clicking the “Personal Data” link.

Clicking the “View” link will display all the personal data of the subscriber.

Note that we do not recommend editing the tags that are already used in messaging campaigns since that will affect ongoing campaigns and data collection.
How do I collect personal data using tags?
- You may collect personal data by using data collection questions. In the settings of a data collection question, you can store the response with your tag. So when a message with the data collection question is sent to your audience members and they reply back, then the tag will be used to store their responses.
- You may collect personal data by using web forms. You can add a form item and replace the field name/ID of the item with your tag. So when your audience members filled in the field and submitted the web form, then the tag will be used to store the data.
How do I use Dynamic Merge Tags?
The purpose of a dynamic merge tag is to personalize the text sent to each customer. After setting the tag mapping, you can import data to your audience list by mapping the data to your tags. You can add the tag name in the custom label option.
You can include dynamic merge tags in either SMS or MMS message body in this format: {$variable|default}. The tags are replaced with data from your audience list prior to delivery. If your tag is First-Name, you could add {$First-Name|Customer}. The tag is not case sensitive, so {$first-name|Customer} would also work.
Then our system will replace the tag with the first name of the recipient before delivery. If the first name is not present, we will replace the tag with the default value of ‘Customer’ instead.
For example, let’s say your message text includes the following text with dynamic merge tag: Hi, {$first-name|customer}!. For personal text messages, clients can use dynamic merge text to say, “Hi, John!” for a particular phone number that has the personal data, ‘John’ as the first name. And if there is no personal data associated with the phone number, the recipient will receive the text saying, “Hi, Customer!”
